Skiing in the Swiss Alps offers some of the most incredible views and challenging terrain in the world. Grimentz and Zinal, located in the stunning Val d’Anniviers, are well-known for their vast off-piste opportunities and reliable snow conditions.
However, the beauty of the high mountains comes with real risks that every skier and snowboarder needs to respect. Stepping off the groomed trails means you are entering a wild environment where the rules of the resort no longer apply.
You become responsible for your own safety and the safety of those around you. This is why taking an avalanche safety course in Grimentz is a smart move for anyone looking to explore beyond the ropes. It is not just about having the right gear; it is about knowing how to use it and how to make smart choices when the stakes are high.
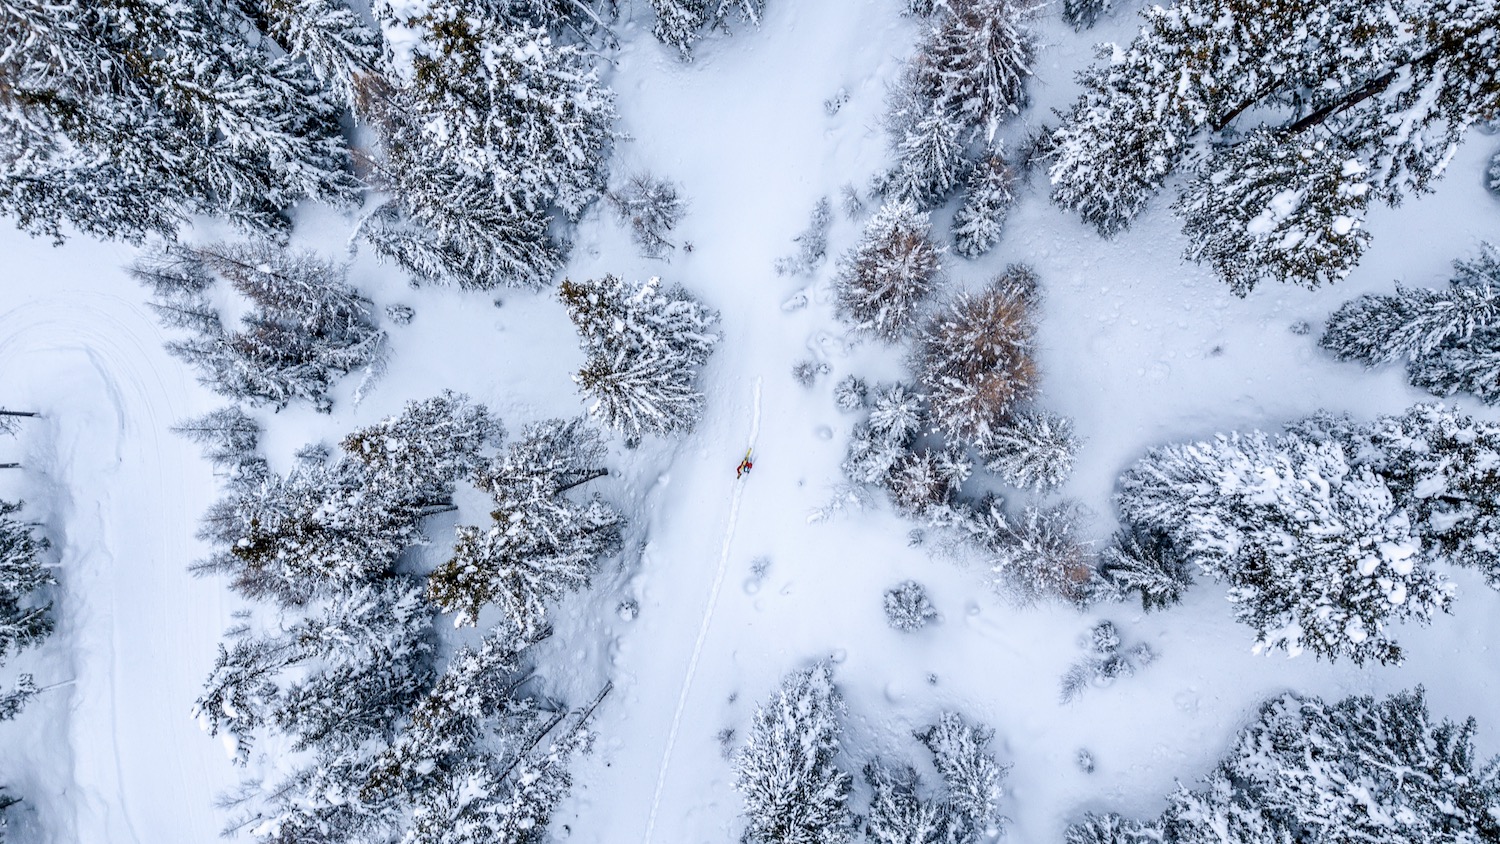
The terrain around Grimentz and Zinal is complex. You have steep couloirs, wide-open bowls, and technical glacial areas that require a high level of awareness. Many people think that following someone else’s tracks is a safe way to explore, but that is a dangerous mistake.
Tracks do not mean a slope is stable. Snow conditions change by the hour, and a slope that was safe in the morning might be ready to slide by the afternoon. To move safely in this environment, you need a solid foundation in mountain safety.
This involves understanding how the weather affects the snow, how to read the shape of the land, and how to react if something goes wrong. In this article, we will look at the different aspects of staying safe in the backcountry and how you can expand your skills to enjoy the mountains with confidence.
As we saw earlier, the mountain environment is constantly shifting. This means your education should never really stop. Whether you are a seasoned local or a first-time visitor to the Val d’Anniviers, there is always something new to learn about the snow.
By focusing on practical skills and real-world scenarios, you can transform your skiing experience from a simple run down the hill into a high-performance adventure where you are controlling the risks you take. Let’s start by looking at the environment itself and what you need to watch out for when you leave the marked runs.
Content
Understanding the mountain environment in Val d’Anniviers
The geography of Grimentz-Zinal is unique. The valley is surrounded by some of the highest peaks in the Alps, including the Dent Blanche and the Zinalrothorn. This high altitude means the snow stays cold and dry for longer, which is great for skiing but also creates specific challenges for snow stability.
When you are out there, you need to be looking at more than just the powder under your skis. You need to be looking at the whole mountain. This starts with identifying terrain features that can either keep you safe or put you in danger.
For example, knowing the difference between a convex slope and a concave one can change your entire route plan. Convexities, where the slope gets steeper as you go down, are often where avalanches start because the snow is under more tension.
Identifying terrain features and risks
Terrain is the one thing that doesn’t change, even when the weather does. Learning to read the land is a vital part of mountain safety training. You want to look for “terrain traps.” These are features like gullies, cliffs, or flat benches at the bottom of a steep slope.
If an avalanche happens in a gully, the snow piles up much deeper than it would on a flat face, making it much harder to escape or be rescued. Cliffs are obvious dangers; even a small slide can push you over an edge with catastrophic results.
When you are planning your line, you should always be looking for “islands of safety.” These are areas like thick stands of trees or high ridges where you are protected from slides coming from above. By moving from one safe spot to another, you minimize the time you spend in high-risk zones.
Another thing to consider is the aspect of the slope. This refers to the direction the slope faces. In the northern hemisphere, north-facing slopes get very little sun in the winter. This keeps the snow cold, but it also means weak layers can persist for weeks or even months.
South-facing slopes get a lot of sun, which can cause the snow to melt and refreeze, creating a crust. This crust might be stable, or it might act as a slippery slide for new snow that falls on top of it. Wind is another huge factor.
In Grimentz, the wind often blows from the west or northwest. This strips snow from one side of a ridge and deposits it on the other, creating “wind slabs.” These slabs are often very brittle and are a leading cause of skier-triggered avalanches. Recognizing these patterns is a skill that takes time to develop, but it is one of the most important tools in your kit.
Reading the local weather patterns
Weather is the primary driver of snow instability. If you want to stay safe, you have to become a bit of a weather nerd. In Switzerland, we are lucky to have the SLF (Institute for Snow and Avalanche Research) and MeteoSwiss, which provide incredibly detailed reports.
Before you even put your boots on, you should be checking the avalanche bulletin. This report tells you the current danger level on a scale of 1 to 5. But don’t just look at the number.
Read the description. Is the problem “new snow,” “wind-drifted snow,” or “persistent weak layers”? Each of these problems requires a different approach to skiing.
For instance, if the problem is wind-drifted snow, you can often stay safe by avoiding leeward slopes and sticking to wind-scoured areas. If the problem is a persistent weak layer, the danger is much more “intrinsically” hidden.
You might see tracks on a slope and think it’s fine, only for the whole thing to collapse because of a weak crystal layer deep in the snowpack. This is why local knowledge is so valuable. The weather in the Val d’Anniviers can be quite different from the weather in the next valley over.
Sometimes the “Bise” wind blows in from the north, bringing cold air and creating specific drift patterns that you won’t find elsewhere. Staying updated on the last 48 to 72 hours of weather is vital because that is usually how long it takes for new snow to settle and bond to the old layers.
Later in this article, we’ll look at this in more detail when we talk about how to actually test the snow yourself. But for now, remember that the weather you see today is only half the story. The weather that happened a week ago is still sitting there, buried under the surface, waiting to react to the weight of a skier.
Essential equipment for every off-piste skier
Having the right gear is non-negotiable. If you are skiing off-piste without a beacon, shovel, and probe, you are not just risking your own life; you are being unfair to your friends who will have to try and find you without the proper tools.
This set of equipment is often called the “Holy Trinity” of backcountry safety. However, simply buying the gear isn’t enough. You need to know how to use it instinctively. In a real emergency, your brain will likely be flooded with adrenaline, and you won’t have time to read a manual. This is where a rescue gear tutorial becomes incredibly valuable. You need to practice until the movements are part of your muscle memory.
| Equipment piece | Purpose | Key features to look for |
|---|---|---|
| Avalanche Beacon | To locate a buried person or be located. | Three antennas, digital display, marking function. |
| Shovel | To dig out a buried person quickly. | Aluminum blade, extendable handle, UIAA certified. |
| Probe | To pinpoint the exact location and depth. | At least 240cm long, quick-locking mechanism. |
| Airbag Backpack | To help you stay on the surface of a slide. | Reliable trigger, comfortable fit, enough space for gear. |
The digital beacon and its functions
Modern beacons are amazing pieces of technology. They have three antennas that allow them to give you a directional arrow and a distance reading in three dimensions. When you start your day, you should always perform a “group check.”
One person sets their beacon to “search,” and everyone else walks past to ensure their beacons are transmitting correctly. It is a simple habit that saves lives. If your beacon is more than five years old, you should consider upgrading.
The technology moves fast, and newer models are much faster at processing signals, especially in “multiple burial” scenarios where more than one person is under the snow.
During a search, the beacon has different phases. First is the signal search, where you move in a zigzag pattern until you pick up a signal. Then comes the coarse search, where you follow the arrow on the screen.
Finally, there is the fine search, where you get low to the snow and find the lowest numerical distance. You should never “navigate” this process by guessing; trust the device. It is also important to keep your beacon away from electronic devices like your phone or GoPro, as they can cause interference.
Keep your phone at least 20 cm away from your beacon when it’s in transmit mode and 50 cm away when you are searching. These small details can make a huge difference in how quickly you find your friend.
Choosing the right shovel and probe
When it comes to shovels, bigger is usually better, but it has to fit in your pack. Avoid plastic shovels at all costs. Avalanche debris is not soft powder; it sets like concrete the moment it stops moving.
A plastic blade will snap instantly. Look for a high-quality aluminum shovel with a telescopic handle. The handle gives you more leverage, which is important because you will be moving a lot of snow quickly. Some shovels also have a “hoe mode,” which allows you to pull snow away rather than just lifting it, which is much more efficient during a rescue.
Your probe should be at least 240 cm long. In many parts of the Swiss Alps, snow depths can easily exceed two meters, and you need a probe that can reach the ground. Look for a probe that is easy to assemble even when you are wearing gloves and shaking from cold or stress.
Carbon probes are light, but aluminum probes are often more durable and can penetrate icy layers more effectively. Once you have your gear, you need to practice. Put a beacon in a backpack, bury it in the snow, and see how long it takes you to find it and “probe” it.
Your goal should be to find a target in under five minutes. As you may have noticed in this article, time is the most important factor in an avalanche rescue. After 15 minutes, the chances of survival drop significantly.
Technical skills for snow evaluation
While gear is for when things go wrong, snow evaluation is for making sure things go right. Understanding what is happening beneath your skis is a fascinating part of the mountain experience. It turns the mountain into a book that you can learn to read.
This process is called snowpack analysis. It involves looking at the different layers of snow that have fallen throughout the season and seeing how well they are stuck together. If you have a heavy, strong layer sitting on top of a light, weak layer, you have the perfect recipe for an avalanche.
Performing a thorough snowpack analysis
To really see what’s going on, you often need to dig a hole. This is called a snow pit. By digging down to about a meter or a meter and a half, you can see the history of the winter.
You might see a layer of “graupel” (which looks like little Styrofoam balls) or “surface hoar” (which looks like beautiful feathers). While these look pretty, they are terrible for stability. They act like ball bearings under the snow. When you perform a snowpack analysis, you are testing how much pressure it takes to make these layers slide.
One common test is the compression test. You isolate a column of snow and tap on your shovel blade—first with your fingers, then your wrist, then your elbow. If the snow collapses on the first few taps, the stability is poor. Another more advanced test is the Extended Column Test (ECT).
This helps you see if a crack will “propagate” or spread across the whole slope. If a crack spreads quickly, it means that if you trigger a small slide, it could turn into a massive one that takes out the entire face.
These tests give you “data points” to help you decide whether to ski a line or head back to the lodge. However, remember that one pit only tells you about that specific spot. You have to combine what you see in the pit with your observations of the terrain and the weather.
Identifying weak layers in the snow
Weak layers are the “engine” of an avalanche. The most dangerous ones are often the ones you can’t see from the surface. In the Grimentz-Zinal area, we often deal with “facets.” These are square-shaped crystals that form when there is a big temperature difference between the ground and the air. They don’t bond to each other at all.
If you pick up a handful of faceted snow, it runs through your fingers like sugar. If this “sugar snow” is buried deep down, it can stay dangerous for the entire season. This is why some slopes stay “red flagged” on the avalanche map even weeks after the last storm.
Another thing to look for is “depth hoar.” This is a more extreme version of facets that form at the very bottom of the snowpack. It is often responsible for the massive, “full-depth” avalanches that happen in the late winter or spring. Understanding these crystals is a big part of an AIARE course in Switzerland or similar high-level training.
When you know what to look for, you start to see the mountain differently. You stop looking at just the “freshies” and start thinking about the foundation. If the foundation is weak, it doesn’t matter how good the top layer looks. You have to be willing to walk away from a beautiful line if the snow science tells you it’s not safe.
Human factors and decision making
Surprisingly, most avalanche accidents aren’t caused by a lack of gear or a lack of snow knowledge. They are caused by human error. We are emotional creatures, and our brains often play tricks on us when we are excited. This is a major focus of mountain safety training. We call these “heuristic traps.” They are mental shortcuts that lead us to make bad decisions.
For example, the “social proof” trap happens when you see a group of people skiing a slope and assume it must be safe because they are doing it. In reality, they might just be lucky, or they might be making a huge mistake.
Avoiding common psychological traps
One of the most dangerous traps is “powder fever.” We’ve all felt it. You’ve traveled all the way to Grimentz, you’ve paid for your lift pass, and the snow looks incredible. You want to ski that line so badly that you start to ignore the warning signs.
You see a “whumpf” (the sound of the snowpack collapsing), but you tell yourself it was just a small pocket. Or you see a wind slab but convince yourself it’s not that big. This is where “confirmation bias” kicks in—you only look for information that supports what you want to do, and you ignore the information that tells you to stop.
Another trap is “expert halo.” This happens when one person in the group is perceived as being the most experienced, and everyone else just follows them without questioning their decisions. Even the most experienced guides can make mistakes.
A safe group is one where everyone feels comfortable speaking up. If the least experienced person in your group feels uneasy about a slope, the whole group should listen. Often, that “gut feeling” is your brain picking up on subtle clues that you haven’t consciously processed yet. Learning to manage these “human factors” is just as important as learning how to use a beacon.
Effective communication within your group
Before you even leave the parking lot, you should have a plan. Where are you going? What is the “plan B” if the weather turns? What are the “no-go” criteria for the day? Good communication keeps everyone on the same page. When you are on the mountain, talk to each other constantly.
“I don’t like how that ridge looks,” or “Did you feel that crust under the new snow?” are the kinds of conversations that keep people alive. You should also decide on “travel protocols.” This means things like skiing one at a time. If only one person is on the slope, and it slides, the rest of the group is in a position to perform a rescue. If everyone skis at once, everyone gets buried, and there is no one left to dig.
You should also have clear signals. In the wind and noise of the mountains, it can be difficult to hear. Use simple hand signals or whistles. Make sure everyone knows where the “safe zones” are for each pitch.
When you reach the bottom of a run, don’t just stop in the middle of the valley. Move to a spot that is protected from above. Many people have been caught in a second avalanche while they were celebrating at the bottom of the first one. By keeping the communication lines open and following strict protocols, you can enjoy the backcountry while keeping the risk at a manageable level.
Rescue protocols and emergency response
If the worst happens and someone is caught in an avalanche, the next few minutes are the most important of your life. You have to move from being a skier to being a rescuer in a matter of seconds.
This is why having a clear, practiced plan is vital. The first step is always to ensure your own safety. You can’t help anyone if you get caught in a second slide. Once the snow stops moving, you switch your beacon to “search” and begin the rescue process. This is a core part of any backcountry safety tips you will receive from professionals.
Step by step search and recovery
The search is divided into phases. The “signal search” is about finding that first beep. You move quickly across the debris. Once you have a signal, you enter the “coarse search.” This is where you follow the arrow on your beacon.
Speed is important here, but don’t run so fast that you miss a signal change. As the distance on your screen drops below 10 meters, you slow down. This is the “fine search.” You get your beacon as close to the snow as possible and move it in a cross pattern to find the lowest number. Don’t rotate the beacon; keep it pointed in the same direction.
Once you have the lowest number, you “pinpoint” with your probe. You start in the center and spiral outwards in 25 cm increments until you hit something soft. Leave the probe in the snow! It acts as a marker so you don’t lose the spot while you are digging. Now comes the hardest part: shoveling. You should start digging “downhill” from the probe.
If the person is buried 1.5 meters deep, you should start your hole about 1.5 meters away from the probe. This allows you to dig a “platform” and reach the person from the side, which is much more efficient than digging a vertical hole. It also prevents you from accidentally stepping on the person’s face or chest, which could interfere with their “air pocket.”
First aid considerations in the cold
Once you reach the person, the priority is their airway. Clear the snow from their mouth and nose immediately. Even if they are not breathing, don’t give up. People have been successfully resuscitated after being buried for a long time because the cold slows down their metabolism.
However, you also have to deal with “hypothermia” and “trauma.” Avalanches are violent; people often hit trees or rocks on the way down. You need to be careful when moving them in case of spinal injuries.
You should always carry a basic first aid kit and a “space blanket” or emergency bivy bag. Keeping the patient warm is vital. If you can, get them off the snow and onto a backpack or some extra clothing. Call for help as soon as it is safe to do so.
In Switzerland, the number for the Rega (air rescue) is 1414, or you can use the international emergency number 112. Be prepared to give your exact coordinates, the number of people buried, and the current weather conditions. Having an app like “Echo112” on your phone can send your GPS coordinates directly to the rescuers, which saves a huge amount of time.
Why Grimentz is the ideal place for training
Grimentz-Zinal is not just a great place to ski; it is one of the best places in Europe to learn about the mountains. The variety of terrain here is incredible. Within a short distance from the lifts, you can find everything from gentle meadows to massive glacial faces.
This allows you to see many different types of snow conditions and terrain features in a single day. Taking an avalanche safety course in Grimentz provides you with access to this “living laboratory.” You can see how the wind affects the ridges of the Orzival area or how the sun changes the snow on the slopes of the Bec de Bosses.
Accessing diverse terrain types
The lift system in Grimentz-Zinal is very efficient, which means you can spend more time learning and less time hiking. You can quickly get to high-altitude areas like the Espace Freeride in Zinal, which is a dedicated off-piste zone.
This area is perfect for practicing backcountry safety tips because it is ungroomed but monitored by the ski patrol. It’s a great “middle ground” for those who are just starting to explore off-piste. You can practice your beacon searches in real debris or learn how to navigate through complex rock bands without being miles away from help.
For more advanced skiers, the “Val d’Anniviers” offers endless possibilities for ski touring. You can head over to the Moiry Dam or climb up towards the Grand Cornier. These longer trips require more advanced planning and more detailed snowpack analysis.
Being based in Grimentz means you are in the heart of the “Imperial Crown,” surrounded by five peaks over 4000 meters. The scale of the mountains here is humbling, and it reminds you why taking your education seriously is so important. It’s about more than just skiing; it’s about becoming a true “mountaineer” who understands and respects the alpine world.
Local resources and safety services
One of the best things about this region is the community of professionals who live and work here. The local guides and instructors have spent years studying these specific mountains. They know which slopes are prone to sliding after a north wind and which gullies hold the best (and safest) snow.
Using a rescue gear tutorial from a local expert is much more valuable than watching a video online. They can show you the specific spots where accidents have happened in the past and explain why they occurred. This local context makes the lessons stick.
The resort also takes safety very seriously. The “Avalanche Training Center” in Zinal is a fantastic resource. It is a permanent installation where you can practice finding buried transmitters with your beacon and probe.
It’s free to use and is a great way to warm up your skills at the start of your holiday. Combined with the high-end private instruction available in the valley, you have everything you need to take your skiing to the next level. Whether you are looking for an AIARE course in Switzerland or just a day of guided off-piste exploration, the resources here are world-class.
| Resource | Location | Benefit |
|---|---|---|
| Avalanche Training Center | Zinal (near Sorebois) | Free practice for beacon and probe skills. |
| Espace Freeride | Zinal | Monitored off-piste zone for safe practice. |
| SLF Bulletin | Online / App | Daily updates on snow stability and danger levels. |
| Local Ski School | Grimentz-Zinal | Personalized coaching and terrain consulting. |
As you can see, staying safe in the mountains is a combination of gear, knowledge, and mindset. It’s about being prepared for the worst while making decisions that ensure the worst never happens.
By investing in your education and practicing your skills, you turn the backcountry into a place of freedom and adventure rather than a place of fear. The mountains of the Val d’Anniviers are waiting for you, and there is no better feeling than standing at the top of a pristine powder run knowing that you have the skills to handle whatever the mountain throws at you.
The mountains are a place of endless discovery, and Grimentz-Zinal offers some of the best experiences in the Alps. By taking the time to expand your technical skills and understanding of the terrain, you are not just becoming a safer skier; you are becoming a more capable and confident explorer.
Whether you are looking to improve your off-piste technique or want to learn the latest in snow science, we are here to help you reach your goals. Our personalized approach ensures that you get the specific training you need for the terrain you want to ski.
If you are ready to take your mountain adventures to the next level, feel free to reach out and request any of our ski services, whether it be a private or group lesson.